

|
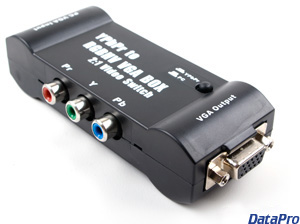
This FAQ will help you set up your devices to properly output for the CSV-955A Component to VGA converter. Most problems can be solved by properly configuring your DVD player or video game console. |
| |||||||||||||
|
No Image Displayed / Monitor Says "Signal Out of Range" First, the basics: Make sure the VGA cable to your monitor is connected to the "VGA Output" port, and that the CSV-955A is switched to "YPrPb" input. To work properly with the CSV-955A, your video source must be set to 480p, 720p, 1080i, or 1080p mode. Many sources default to 480i mode, which is not supported. (Note: The older Vdigi VD-Z3, sold before March 2008, does not support 1080p mode.) If you are using a source with two sets of component outputs, make sure you use the Y Pb Pr output, and not the Y Cb Cr output. If your video source has only one set of component video output, you will probably need to change its setting to progressive-scan output. In most game consoles, you will need to connect the component cables in order to access the progressive-scan options. If you don't have any way to connect the component cables to a monitor during this setup process, try connecting the green plug to a regular TV's yellow video input port. Setup guides are available for various consoles:
If none of the above helps and you are trying to use 720p, 1080i, or 1080p mode, change the output mode to 480p. Some monitors do not understand widescreen signals. Some 4:3 monitors may vertically stretch a 720p, 1080i, or 1080p signal. For 4:3 monitors, 480p is the recommended resolution. Alternatively, some sources will allow you to select the shape of your monitor. If your widescreen monitor is stretching the image, there are several possible solutions:
Colors Look Wrong / Image is Purple Some displays (especially ViewSonic) may incorrectly detect the CSV-955A's signal as YUV (YPbPr). You will need to set your display's color-space to RGB. Also make sure you've correctly connected the component video cable at both ends, matching the colors on the cable to the colors on the ports. I Have The Older Vdigi VD-Z3. What Switch Settings Should I Use? To translate component video to VGA, make sure the input switch is in the "YPbPr" position. For VGA passthrough from a PC, set the switch to "VGA". In most situations, you should turn on dip switches 2 and 5, and turn off all other switches. If this doesn't work for you, make sure your source is properly configured (see above) before attempting other dip switch combinations. Dip switches in detail:
| ||||||||||||||
|
||
