


- Choosing a plate
- Adding Cutouts and Connectors
- The Cutout Dialog Box
- Positioning Cutouts & Connectors
- Custom Logos & Marking
- Saving & Sharing
Choosing a Plate:
We offer a huge variety of plate sizes and styles for customization. First choose a category, then select a plate by clicking on its thumbnail.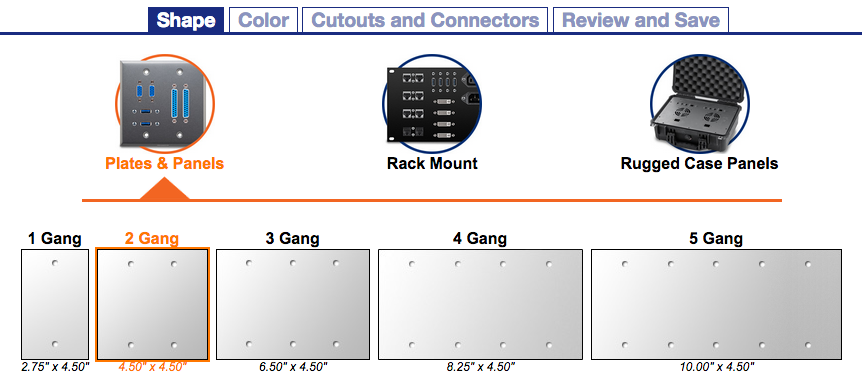 After selecting a plate, color and material options will appear. Click on a color to select it and proceed to the next step.
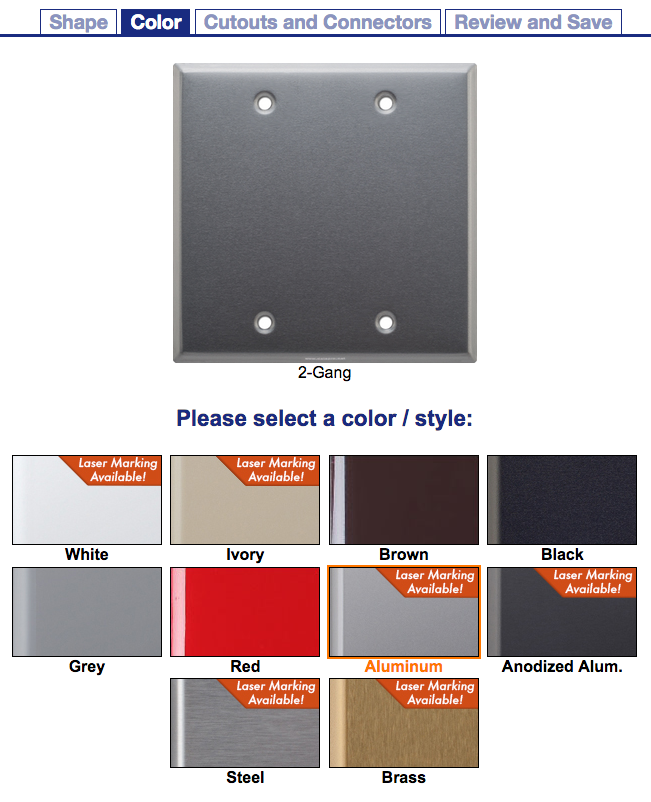
 Tip: Laser marking availability is indicated on the color thumbnail.
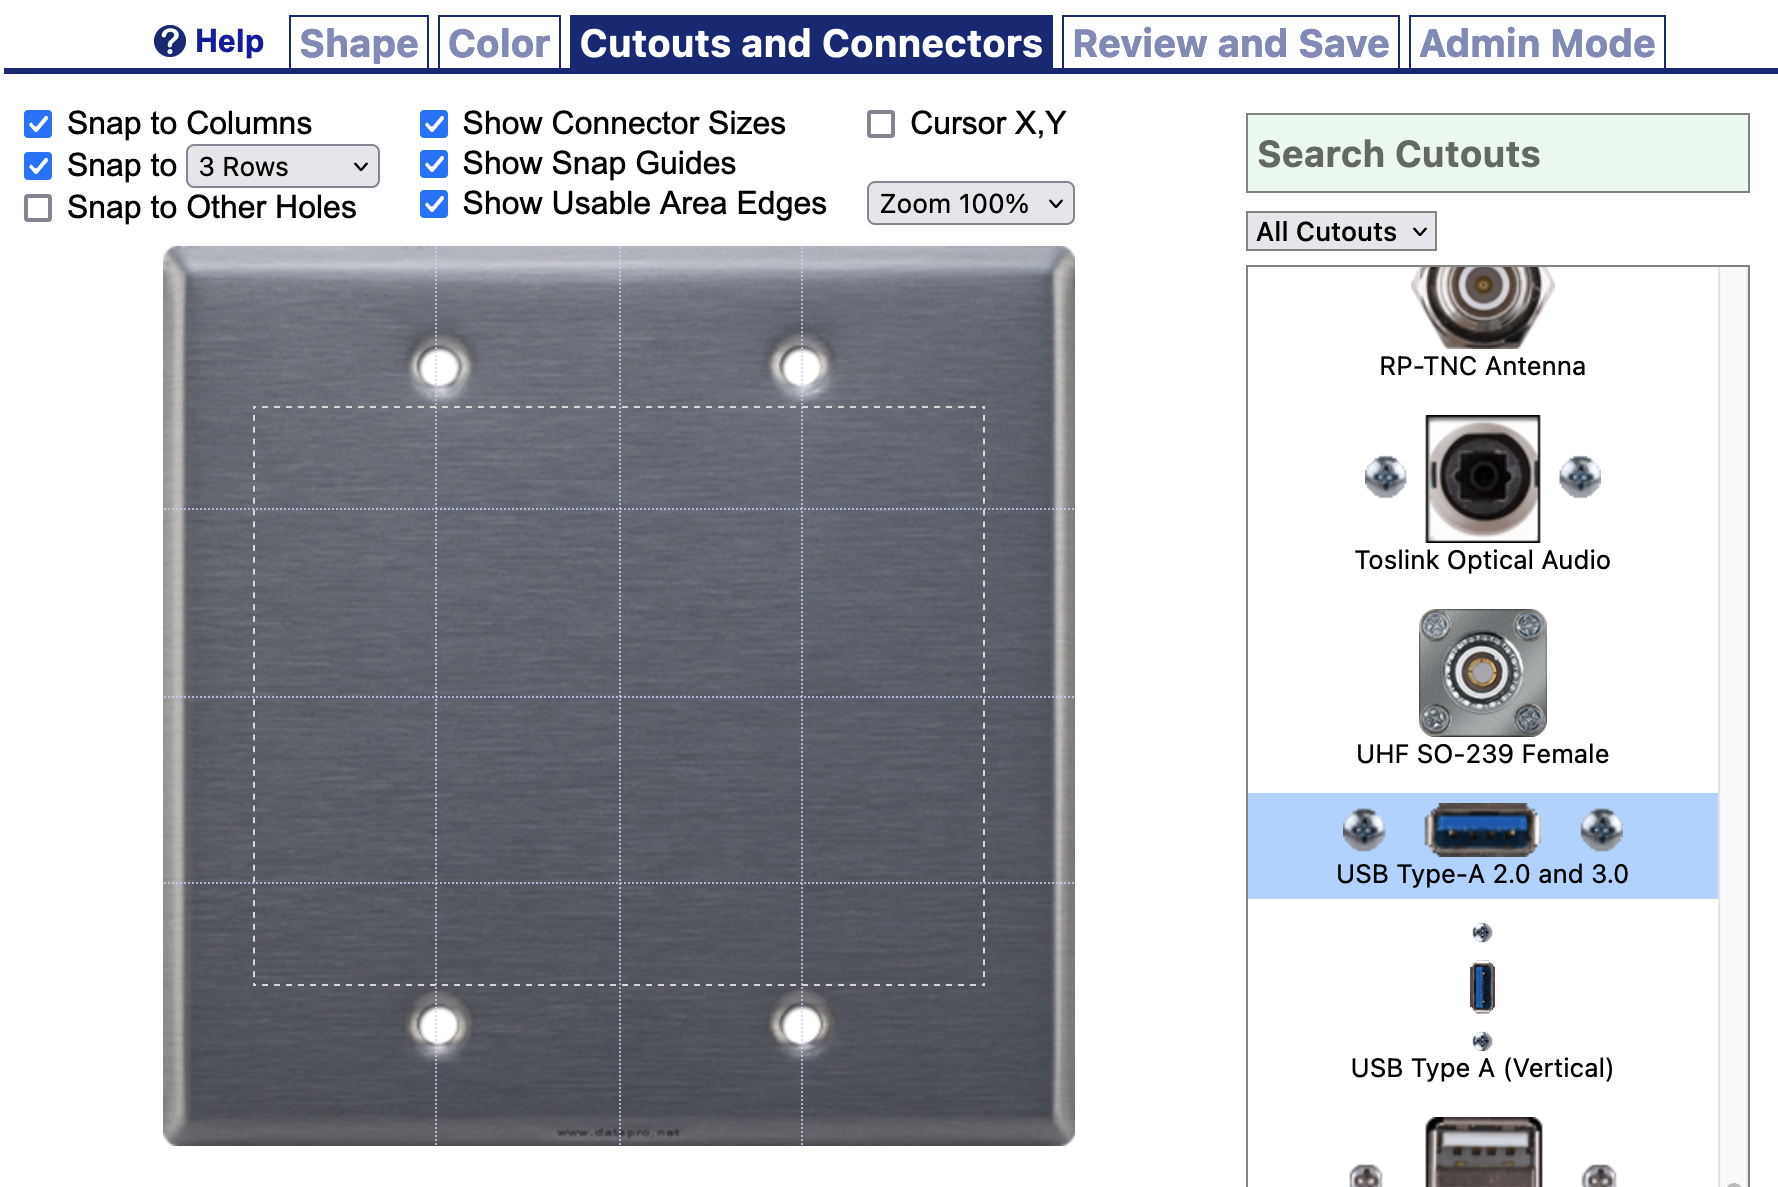
Adding Cutouts & Connectors:
Once a plate has been selected, you can begin adding cutouts and connectors.On the right-hand side of the page is a list of cutouts, each with an optional connector shown. You can add cutouts to your plate by selecting one from the list, then clicking on the plate. Or by dragging a cutout directly from the list to its desired location on the plate.
The list can be filtered by category via the dropdown menu at the top, or you can search for specific cutouts using the Search box.
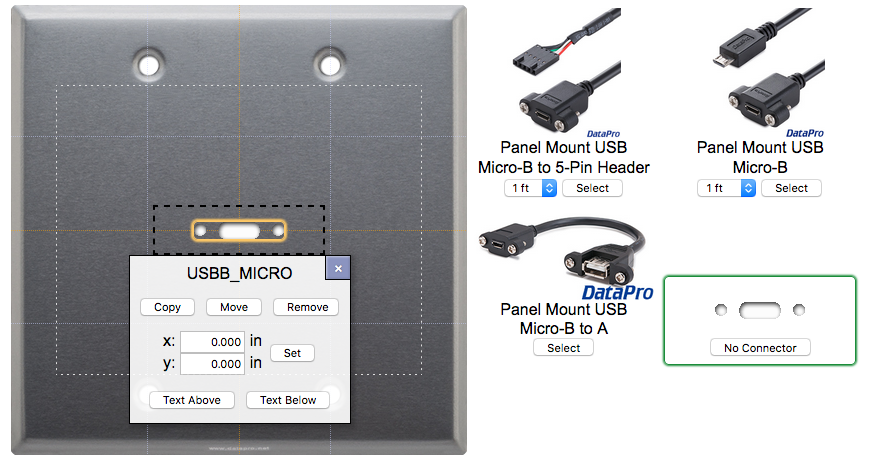
 When clicking on an empty cutout, a list of compatible connectors and cables will be displayed to the right. Click "Select" under the connector's photo to select it and add it to the cutout. You can also select "No Connector" to leave the cutout unfilled.
 Tip: At any point you can use the links at the top of the page to return to the Shape or Color screens and change your selection.
The Cutout Dialog Box:
When clicking on a cutout or connector, a dialog box will appear with various options.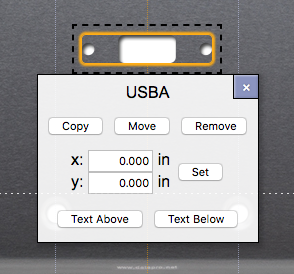
- Copy - Copies the cutout, connector, and associated labels, and pastes them in the next location you click.
- Move - "Cuts" the cutout, connector, and and associated labels, and pastes them in the next location you click.
- Remove - Removes the cutout, connector, and associated labels. To remove only the connector, select "No Connector" from the list on the right. The backspace or delete keys can also be used as a shortcut for this function.
- X/Y Coordinates - The position of the cutout in relation to the center of the plate, given in inches. Cutouts can also be dragged into position, or nudged with the keyboard arrow keys.
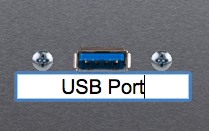
- Text Above/Text Below - Inserts labeling above or blow the connector. Labels can be edited later by clicking directly on the text. Click elsewhere or press the Enter key to confirm your changes.
 Tip: Text can be added anywhere by selecting the "Marking Text" option from the cutout list.
Positioning Cutouts & Connectors:
Cutouts can be arranged on a plate by either dragging them into position, nudging them with the keyboard arrows, or manually entering coordinates. For coordinates, see the Cutout Dialog Box.To assist with placement when dragging, cutouts will default to "snapping" to row and column lines. Gang plates have one column per gang, and optionally 1-4 rows. Other plates have rows and columns at 1" intervals.
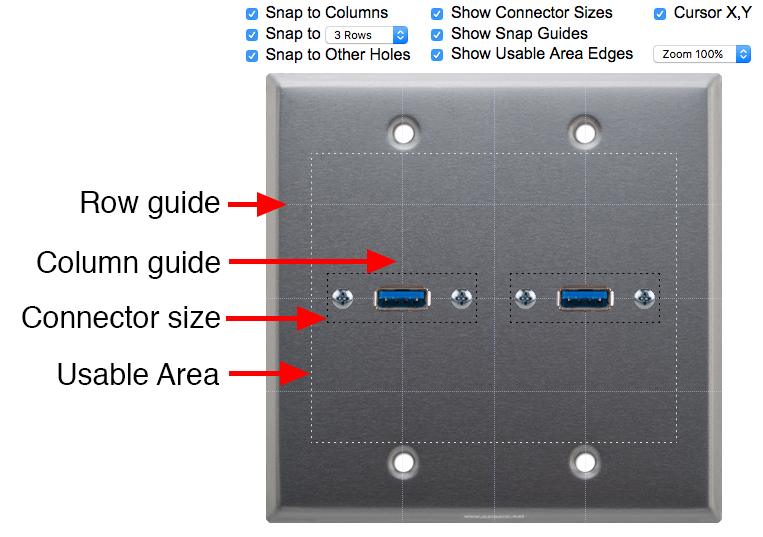
- Snap to Columns - Snaps cutouts to center on column guides.
- Snap to Rows - Snaps cutouts to center on row guides.
- Snap to Other Holes - Snaps to the same horizontal or vertical position as the nearest other cutout.
- Show Connector Sizes - Displays a dotted outline around the cutout, indicating the clearance space required for its connectors. Note that this clearance is required even if not displayed.
- Show Snap Guides - Shows or hides snap guides, including columns, rows, etc. Note that cutouts will still snap to hidden guides.
- Show Usable Area Edges - Shows or hides a perimeter line indicating the usable area of the plate.
- Cursor X,Y - Toggles a floating coordinate display that follows the cursor. When hovering over a cutout, it will display the location of the center of the cutout.
- Zoom - Sets zoom level. Dimensions will remain the same regardless of zoom level.
Tip: Turning off Column and Row snap can make it easier to use Snap to Other Holes.
Custom Logos & Marking:
Logo conversion and marking is covered by a flat fee. Please submit your materials in one of the following vector formats:
- .SVG
- .EPS
- .DXF
- .AI
Saving & Sharing:
When you've finished configuring your plate, click the "Continue to Cart" button for a final review and breakdown of any components added during configuration.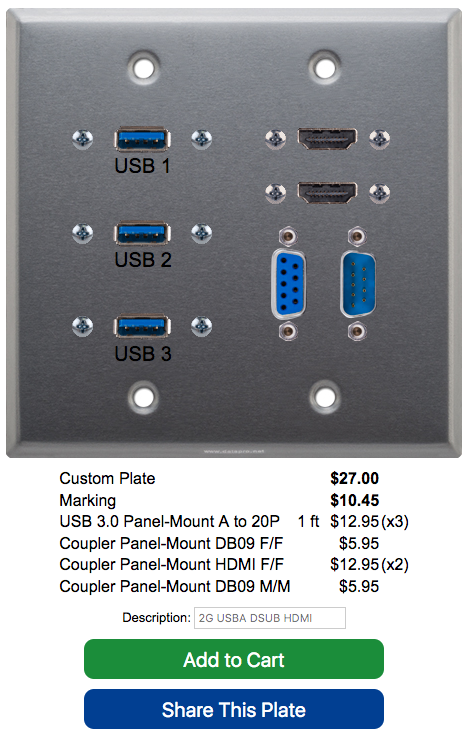 From here you can either add the plate and all components to your cart with the "Add to Cart" button, or you can create a shareable link by clicking "Share This Plate."
